
Classic Charcuterie Board: What Goes On It and How to Build It
A classic charcuterie board is the appetizer that disappears first at every gathering I host, and it never needs the oven. Creamy brie, salty salami roses, sweet figs and crisp crackers sit side by side, so every bite can be sweet, salty or both. It looks like a gourmet cheese and fruit platter, but it is one of the most relaxed things to set out when guests are on their way.
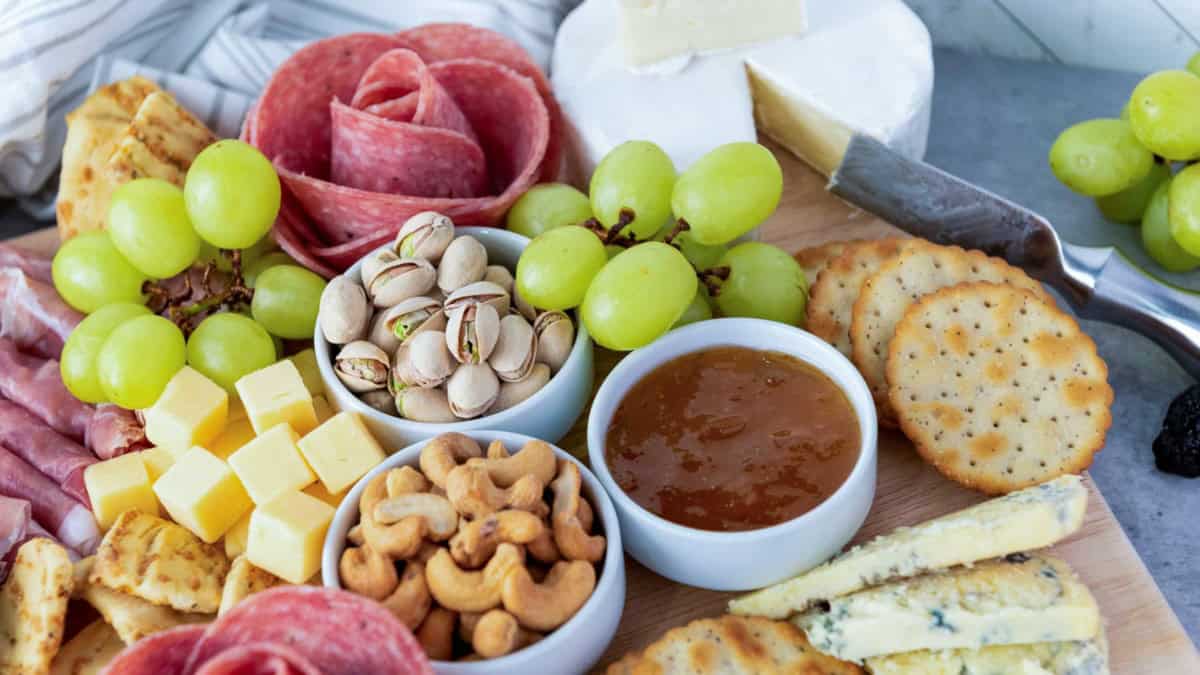
This board pairs three cheeses, two cured meats, grapes, dried figs, nuts, fig jam and two kinds of crackers. Place the cheese first, fold the meats around it, fill the gaps with fruit and nuts, and add the crackers last, which takes about 20 minutes. What decides whether it works is letting the cheese sit out for 30 minutes and adding the crackers right before serving so they stay crisp. That is the whole answer to what goes on a charcuterie board, whether it feeds four or a crowd.
Jump to:
- Why This Classic Charcuterie Board Works
- Pin It For Later
- What Goes on a Classic Charcuterie Board
- How to Make a Classic Charcuterie Board
- How to Make Salami Roses That Hold Their Shape
- Kids Charcuterie Board Ideas Using the Same Spread
- Sizing a Small Charcuterie Board or a Party Spread
- Seasonal and Holiday Twists on the Classic Board
- What to Serve With This Board
- Classic Charcuterie Board FAQs
- Classic Charcuterie Board
Disclosure: This post may contain affiliate links. This means I get a small commission if you decide to make a purchase through my links at no extra cost to you.
Why This Classic Charcuterie Board Works
- It is a true no-cook appetizer. Everything is sliced, folded or spooned, so this quick charcuterie board is ready in about 20 minutes.
- Every bite can be sweet or salty. Figs and jam sit right next to the cured meats, so it works as a savory charcuterie board and a sweet one at once.
- Kids and adults both find something. Mild cheese, crackers, grapes and salami sit beside the bolder picks.
- It is the beginner charcuterie board I recommend to friends. There is no cooking, no special tool, and the layout forgives a few gaps. It covers everything people ask me about charcuterie boards for beginners.
- It scales up or down. The same layout makes a small charcuterie board for four. It also works as one of the party food platters that anchor a whole table.
- It looks elegant with no extra work. The salami roses and fanned crackers make it a beautiful charcuterie board without any styling skills.
- It is naturally colorful. Green grapes, dark figs and pink salami make a colorful charcuterie board with no garnish needed.
Pin It For Later
What Goes on a Classic Charcuterie Board
Here is what goes on a charcuterie board like this one, plus my swaps. These are the basic charcuterie board ingredients for any board. The full cheese board ingredients list is in the recipe card.

- Brie: Brie is the soft centerpiece, so let it sit out until spreadable. It is the easiest charcuterie cheese to spread on crackers. In fall, a pumpkin cheese ball makes the whole board feel seasonal without requiring a complete makeover.
- Gouda and Stilton: Mild Gouda and bold Stilton cover both ends of the charcuterie board cheese types. If you are unsure what kind of cheese for charcuterie works, pick one soft, one firm and one bold. Cubes and crumbles are the easiest charcuterie cheese cuts to grab. If Stilton feels too strong, mild cheddar or Gouda works beautifully. For a longer charcuterie cheese list, see this guide to 36 types of cheese.
- Prosciutto and salami: These are the classic charcuterie board meats. Both are deli-counter staples and the best types of meat for charcuterie board beginners. For more charcuterie meat ideas, pepperoni works in the salami's spot. Folded into roses, the salami doubles as the charcuterie garnish.
- Fruit: I use grapes and strawberries in warmer months and apples and pears in fall. Dried figs stay on year-round because they sit so well next to the brie. A charcuterie board with fruit and cheese needs one fresh fruit and one dried.
- Nuts: Cashews and pistachios are the best charcuterie fillers because they plug small gaps. They are also the key to a charcuterie board on a budget.
- Fig jam: Fig jam is the one condiment I never skip, since it makes this a charcuterie board with cheese and jam. It is the best jam for charcuterie board spreads with brie. For other charcuterie jams and spreads, try a spiced cherry chutney next to the brie or a persimmon chutney in fall, or a sweet and spicy blueberry chutney spooned over goat cheese.
- Crackers: Scalloped and cheese crackers give two shapes and textures. These charcuterie board crackers run out first, so buy extra. They turn a plain cheese plate into a cheese and cracker board.
How to Make a Classic Charcuterie Board
This is an easy meat and cheese charcuterie board, so all of the work is in the arranging. Here is how to make a charcuterie board in five moves, from the biggest items to the smallest. If you have ever wondered how to organize a charcuterie board, this order does it for you.
- Anchor the cheese. Set the brie slightly off center with the jam beside it, and give the Gouda and Stilton their own sections.
- Add the meats. Place the salami roses next to the brie and the prosciutto rolls on the opposite side.
- Fill the big gaps. Tuck the grapes and figs into the larger spaces.
- Fill the small gaps. Scatter the nuts into the small spaces so no bare board shows.
- Finish with crackers. Fan the crackers along the edges right before serving.
A few charcuterie board tips for the layout:
- Reach beats symmetry. Knowing how to lay out a charcuterie board comes down to reach. This charcuterie layout puts every item within reach. Good charcuterie board presentation follows from that, not from symmetry.
- Match the board shape. For a rectangle charcuterie board layout, run the cheeses down the center and the crackers along the long edges. A round charcuterie platter works the same way with the brie in the middle. A cheese board platter or a sheet pan works too.
- Fill every gap. Gaps make a classic charcuterie board look sparse, so the fill steps are the real answer to how to make the best charcuterie board.
- Plan before you shop. Some charcuterie board planning keeps a classic charcuterie board from turning into five cheeses you do not need.
- Leave breathing room. A casual charcuterie board lets guests grab a bite without knocking three others off.
A classic charcuterie board doesn't have to be complicated-it just needs a thoughtful mix of flavors, textures, and colors. With creamy Brie, bold Blue Stilton, salty prosciutto, sweet figs, and crunchy crackers, this board has something for everyone. Try this setup for your next gathering and enjoy the perfect balance of savory, sweet, and crunchy in every bite!
How to Make Salami Roses That Hold Their Shape
This is the charcuterie board rose tutorial I use every time. The salami rose usually holds its shape as long as I use thin, flexible slices and overlap them well.
- Pick thin slices. Thick salami springs back or loosens when you lift the glass.
- Fold over a glass. Fold each slice over the rim of a narrow glass, overlapping it with the one before.
- Take your time. Keep layering until the rim is fully covered.
- Flip and lift. Turn the glass upside down onto the board and lift it straight up.
- Fix any loose slices. If a slice springs back, I simply tuck it back into place.
These charcuterie board meat roses look best right beside the brie, and they do not have to look perfect to look pretty on the board! That is how to make meat roses for charcuterie board spreads that last until guests arrive.
Kids Charcuterie Board Ideas Using the Same Spread
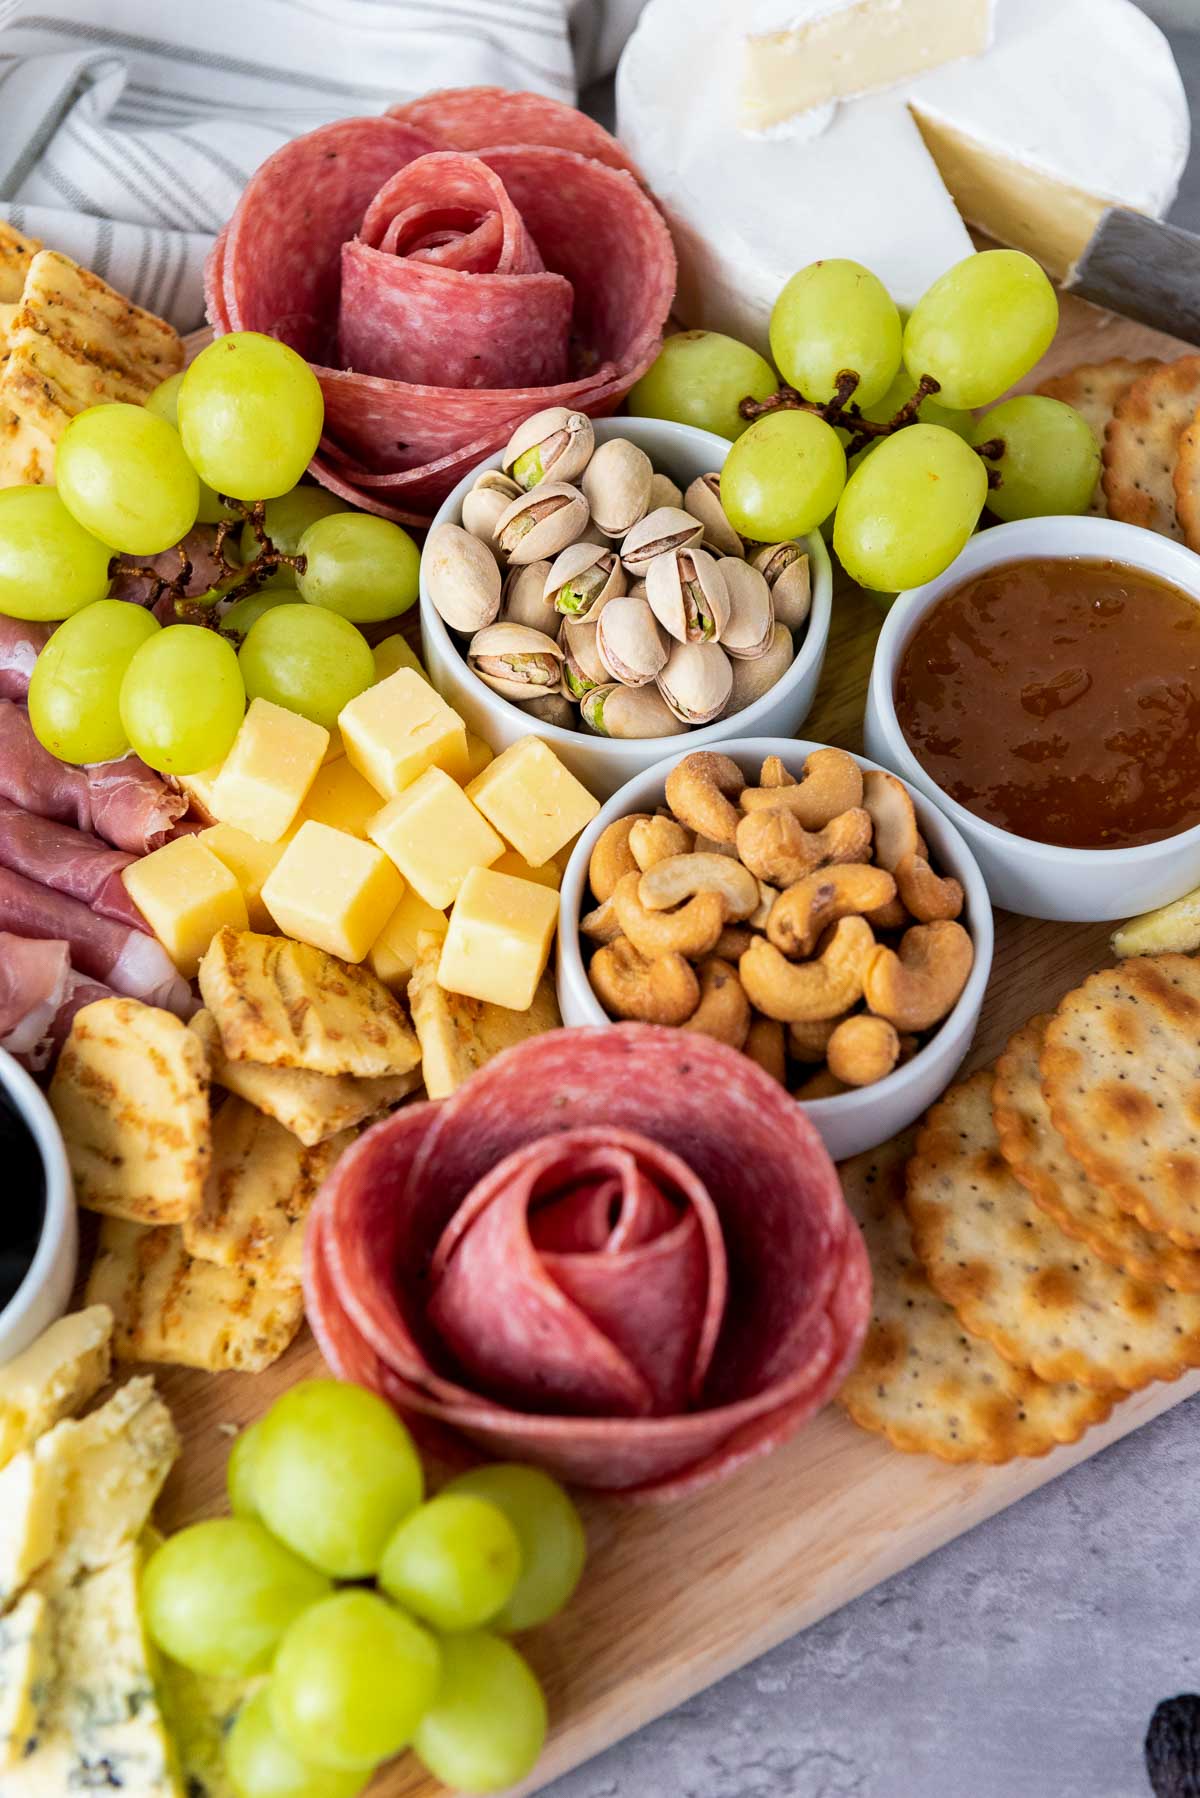
The best kids charcuterie board ideas start with the classic charcuterie board you are already making.
- Lead with familiar favorites. I always include mild cheese, crackers, grapes, strawberries and salami, because they are easy to grab without much fuss.
- Expect the bold picks to stay. Stilton, and olives if you add them, are what I expect younger kids to leave behind.
- Add one or two new things. A mix of familiar foods and a few new things makes the board more inviting for everyone.
- Put their picks within reach. Set the kid-friendly items on their side, and it becomes the easiest charcuterie board in the house to share.
- Swap for a party. Replace the Stilton with extra Gouda and add more grapes, so it reads as a charcuterie snack board instead of a cheese course.
- Let them build. Kids love a build your own charcuterie board setup with small plates.
- Go mini for toddlers. Small charcuterie board ideas work better for little hands, like a muffin tin with one item in each cup.
- Make it fun. Cut the Gouda into stars with a small cookie cutter for a cute charcuterie touch. That one swap turns it into an easy fun charcuterie board for kids.

Sizing a Small Charcuterie Board or a Party Spread
- Before a meal: I think 4-6 servings is a good estimate when the board is served as an appetizer.
- As written: The recipe card makes a 4 person charcuterie board with a little to spare.
- For grazing parties: I'd plan on making it a little more generous, with extra crackers, cheese and cured meats.
- For a crowd: Use the servings slider to scale the charcuterie board quantities, and keep the same layout. A charcuterie board for 25 people is easier as two or three boards than one giant one. The same goes for a charcuterie board for 40 people.
- For two: For a charcuterie board for two, shrink it to one soft cheese, one firm cheese, one meat, one fruit and one cracker. That is my simple charcuterie board on a quiet night. It also works as a little charcuterie board on date night.
- Keep a list. A simple charcuterie board list on the fridge makes the shopping fast.
- For surprise guests: The short version is my go-to last minute charcuterie board when friends text that they are on their way.
It's always better to have a little left over than an almost-empty board while everyone is still gathering around it!
Seasonal and Holiday Twists on the Classic Board
Every themed version starts with this same layout, so think of this classic charcuterie board as charcuterie board 101. Each one is the same easy party charcuterie board with new fruit, colors and a different centerpiece. Swap the fruit and centerpiece to match any of these charcuterie board themes. They are an easy way to try different charcuterie board ideas without learning a new layout. These are my favorite easy charcuterie board ideas for the holidays:
- Halloween: These Halloween charcuterie boards go from sweet to spooky with dark fruit, candy and themed dips.
- Thanksgiving: Set the board out beside a few warm bites from these Thanksgiving finger foods, so guests have something hot to eat while the turkey finishes.
- Christmas: This Christmas charcuterie board arranges the cheese into a tree shape with rosemary sprigs.
- Easter: These Easter charcuterie board ideas range from sweet to savory for spring brunches.
- Fourth of July: These red, white and blue charcuterie boards lean on berries and bright cheese for summer parties.
What to Serve With This Board
Charcuterie appetizers pair best with one warm bite and one dip, so the spread feels like a meal. For a full party food buffet, add one or two of these. They are my favorite things to go with charcuterie board spreads:
- A bowl of green onion dip gives the crackers a second job and pulls in anyone who skips the cheese.
- Mini caprese pizzas are my favorite warm appetizer ideas to set next to the cold board.
- Crispy potato cheese croquettes are hot cheese appetizers that kids grab first.
- Chickpea deviled eggs are a make-ahead bite for guests who want something lighter.
Classic Charcuterie Board FAQs
Yes, and preparing a charcuterie board in two stages is how I always do it. I prefer to prep most of the ingredients the day before and assemble the board closer to serving time. I always save the crackers for the last minute because nobody wants soggy crackers on a charcuterie board! I also keep the cheese covered in the refrigerator until I'm ready to assemble everything so it doesn't dry out.
Cheese and cured meats should sit out for no more than 2 hours at room temperature, or 1 hour on a day above 90°F. Wrap leftover meat and cheese separately and refrigerate them for 3-4 days, and return the crackers to a sealed container so they stay crisp.
It is a beginner shortcut that calls for three cheeses, three meats, three starches and three accompaniments. Like most easy charcuterie board ideas, it works as a guide rather than a rule, and this board follows it loosely with three cheeses, two meats, two kinds of crackers, and fruit, nuts and jam.
Traditional charcuterie means cured and prepared meats like salami and prosciutto. A charcuterie and cheese board pairs those meats with cheese. A plain cheese platter skips the meat entirely. Some people simply call it a cheese and meat board. This one is a charcuterie board with meats and cheeses, which is why the salami roses matter as much as the brie.
Once you have made this classic charcuterie board once, the formula sticks: cheese first, meats around it, fruit and nuts in the gaps, and crackers last. It is the quick and easy charcuterie board I come back to for holidays, birthdays and Friday nights alike. Making charcuterie at home also costs less than a premade tray. If you tried this Classic Charcuterie Board or any other recipe on my website, please leave a 🌟 star rating and let me know how it went in the 📝 comments below.

Equipment
- Large wooden serving board
- Small ramekins or jam dishes
Ingredients
Assorted Cheeses:
- 1 wheel brie (about 6-8 oz)
- 6 oz gouda cubed
- 4 oz blue stilton crumbled
Cured Meats:
- 4 oz prosciutto (about 8-10 slices)
- 6 oz Salami (about 18-20 slices)
Nuts & Fruits:
- ½ cup cashews
- ½ cup pistachios
- 2 small bunches green grapes (about 2 cups)
- 6-8 dried figs
Accompaniments:
- ¼ cup fig jam
Crackers & Bread:
- 15-20 scalloped crackers
- 15-20 cheese crackers
Instructions
- Prepare the Cheeses: Arrange the Brie wheel as the centerpiece. Cube the Gouda for easy snacking. Crumble the Blue Stilton for a bold flavor contrast.
- Assemble the Cured Meats: Roll up the prosciutto into tight rolls. For the salami, place slices over a narrow glass, folding them over each other to create a rose-like appearance.
- Integrate Nuts & Fruits: Scatter Cashews and Pistachios around the board, ensuring they fill gaps and add texture. Place bunches of Green Grapes for a refreshing palate cleanser. Position Dried Figs strategically to balance sweetness.
- Include Accompaniments: Spoon Fig Jam into a small dish and place it near the cheese.
- Layer with Crackers & Bread: Arrange Scalloped Crackers and Cheese Crackers in various spots for a mix of textures.
Notes
- Let the cheese and meats sit at room temperature for 30 minutes before serving for the best flavor and texture.
- Use thin, flexible salami slices for the roses. Thick slices spring back when you lift the glass; tuck any loose slices back into place.
- For kids or anyone who prefers milder cheese, replace the Stilton with mild cheddar or extra Gouda.
- Swap the grapes for strawberries in warmer months, or for sliced apples and pears in fall.
- Prep the fruit and cheese the day before and keep the cheese covered in the refrigerator. Add the crackers at the last minute so they stay crisp.
- For a party where guests will graze for a while, buy extra crackers, cheese and cured meats.
- Do not leave the board out for more than 2 hours, or 1 hour above 90°F.