
Homemade Uncrustables (Freezer-Friendly, No Sealer Needed)
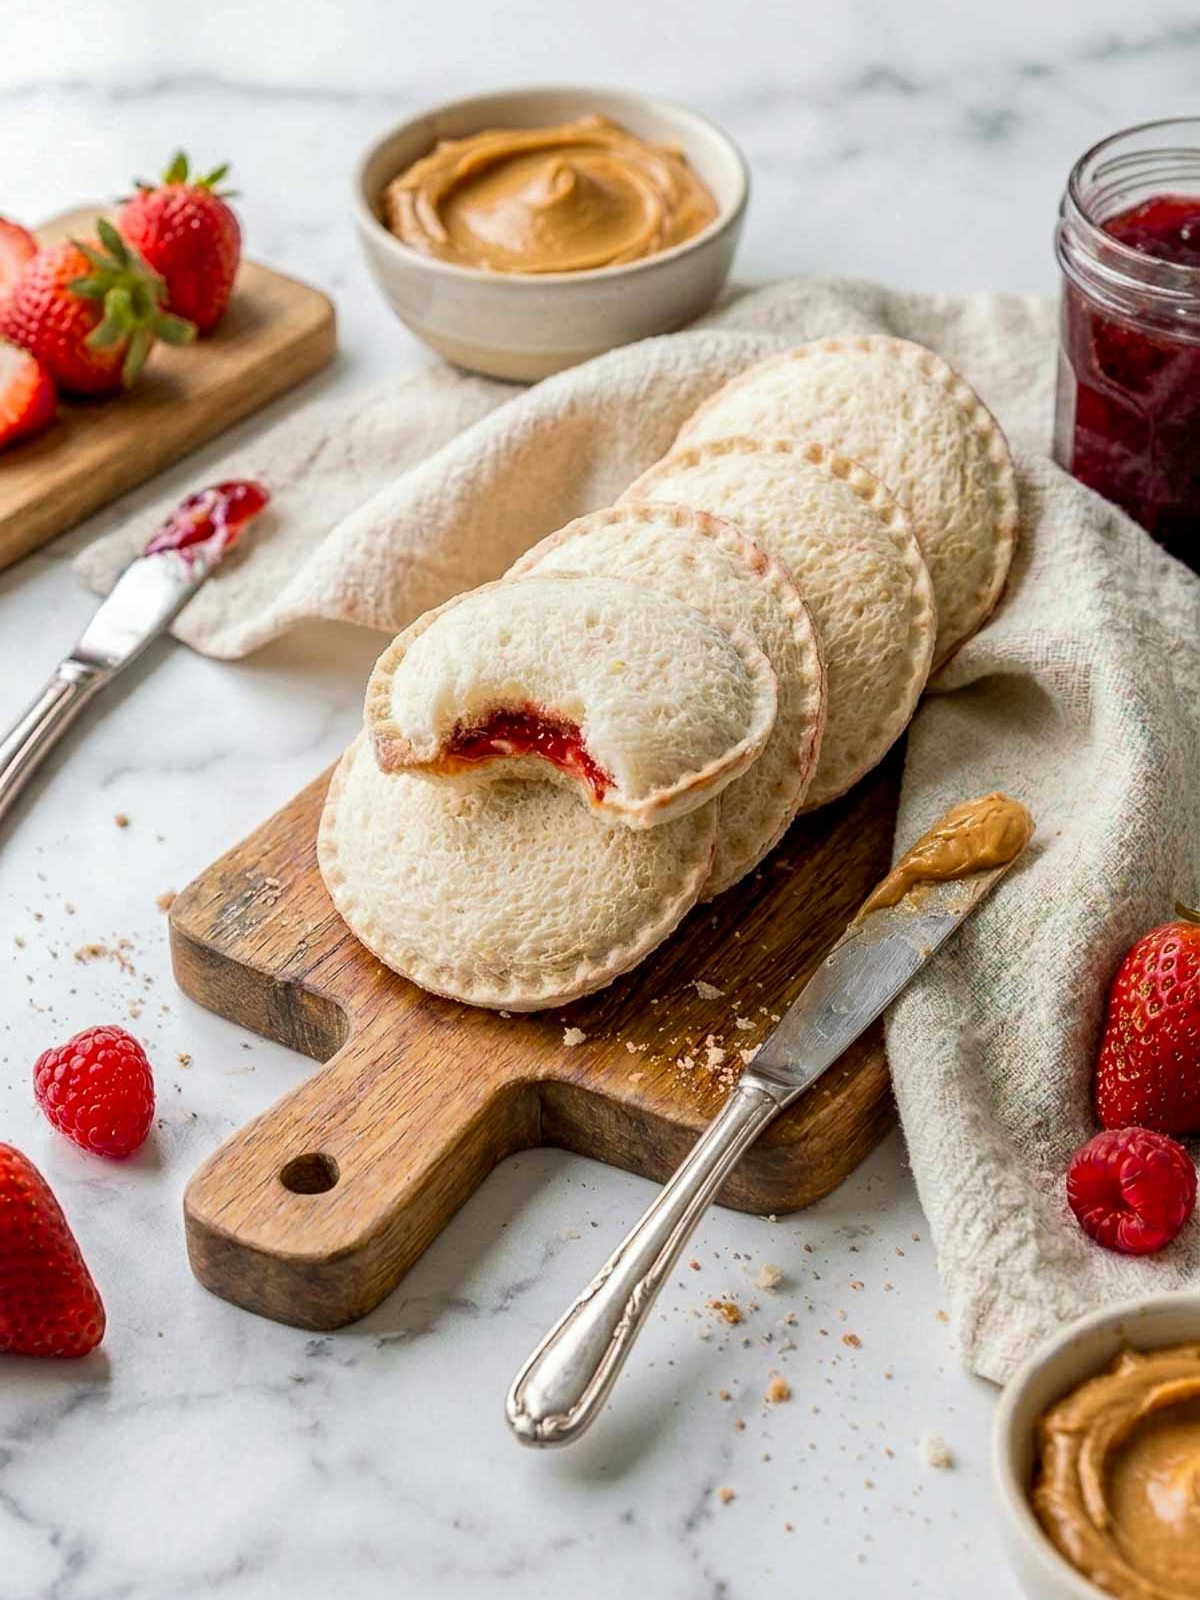
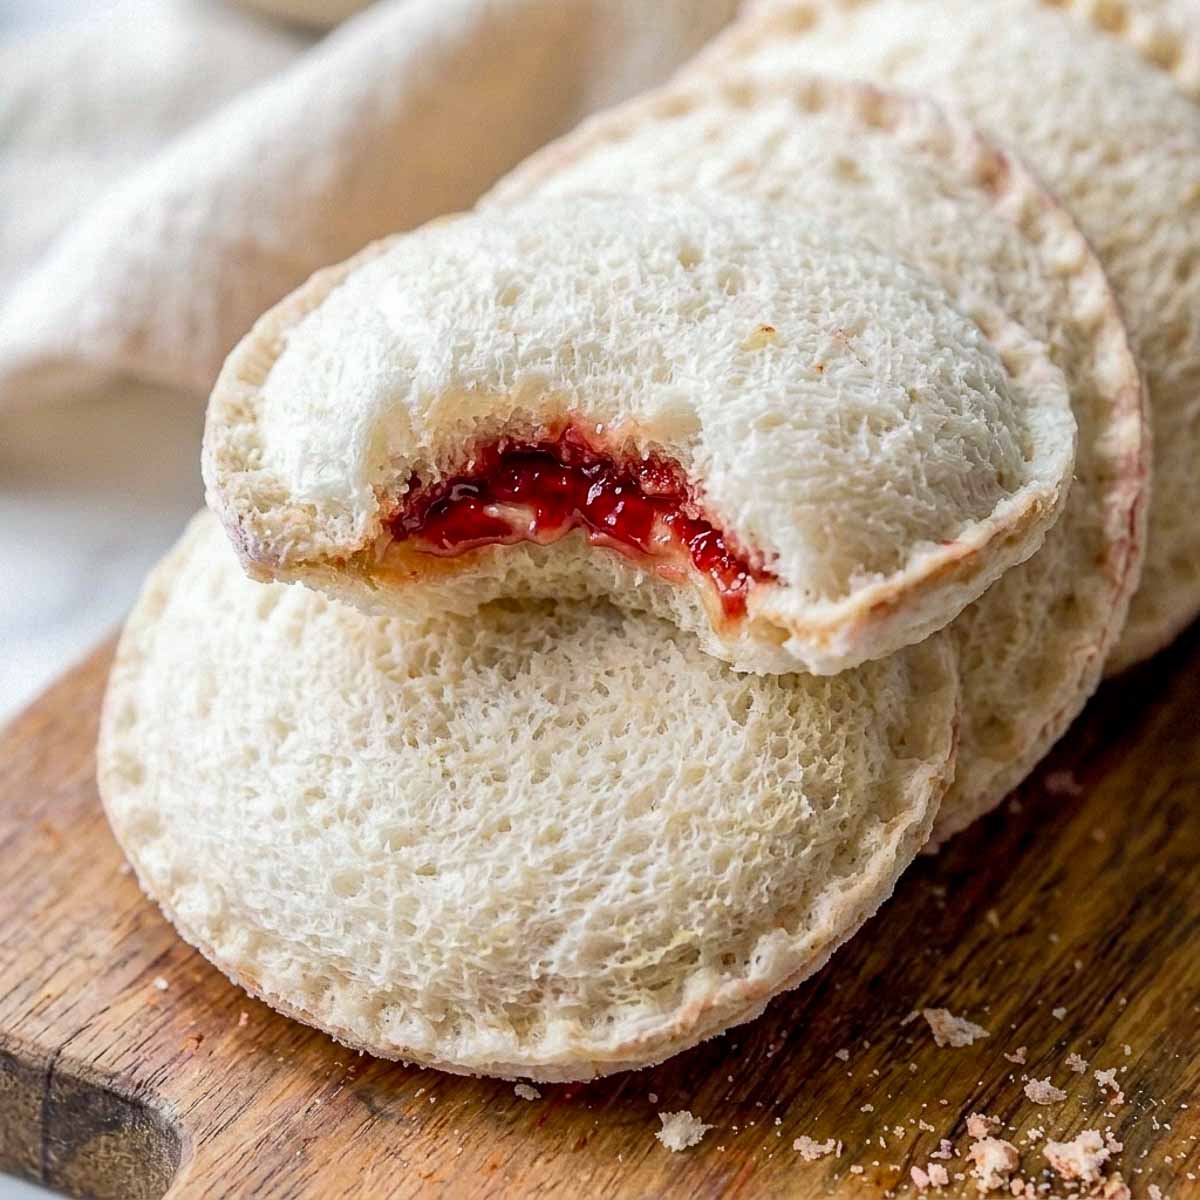
Homemade Uncrustables are round, crustless sandwiches with the filling sealed inside a crimped edge, made in a batch and frozen so you can pack one straight from the freezer on a school morning. You do not need the sealer tool. A wide drinking glass cuts the circle, and the tines of a regular fork crimp the seal, which makes this a diy uncrustables without a sealer method rather than one that needs a gadget.
Disclosure: This post may contain affiliate links. This means I get a small commission if you decide to make a purchase through my links at no extra cost to you.
Jump to:
- What makes this uncrustables recipe work
- Why You'll Love These Homemade Uncrustables
- Key Ingredients
- The Best Bread For Homemade Uncrustables
- How To Make Homemade Uncrustables
- Uncrustables filling ideas
- How To Store Homemade Uncrustables
- Is It Cheaper To Make Your Own Uncrustables?
- What To Pack Alongside
- Homemade Uncrustables FAQs
- Pin It For Later
- Homemade Uncrustables

What makes this uncrustables recipe work
The whole batch takes about 15 minutes of hands-on work and makes 8 sandwiches from 16 slices of soft white sandwich bread. They freeze flat on a sheet pan in an hour, then go into individual bags. Packed frozen at breakfast, one is soft enough to eat by lunch.
The biggest issue with homemade Uncrustables is using too much filling. When the peanut butter or jam reaches the outer edge, the bread cannot seal properly, and the sandwich is more likely to split. I keep the filling in a small circle in the center and leave a wide, completely clean border around it. Everything else about this uncrustables diy recipe is forgiving. You control the bread, and you control the jam, which is the practical reason most people make their own rather than buying the box.
Why You'll Love These Homemade Uncrustables
- No special equipment. A drinking glass and a fork do the entire job.
- Eight sandwiches in about 15 minutes of actual work, which is a school week of lunches for one kid.
- They pack frozen and thaw in the lunchbox, so they keep whatever is sitting next to them cold.
- You pick the bread, the spread, and how much jam goes in.
- Sweet or savory. The same uncrustable sandwich recipe method handles peanut butter and jam, cheese, pizza filling, or egg salad.
- Nut-free swaps work without changing anything about the technique.
Key Ingredients
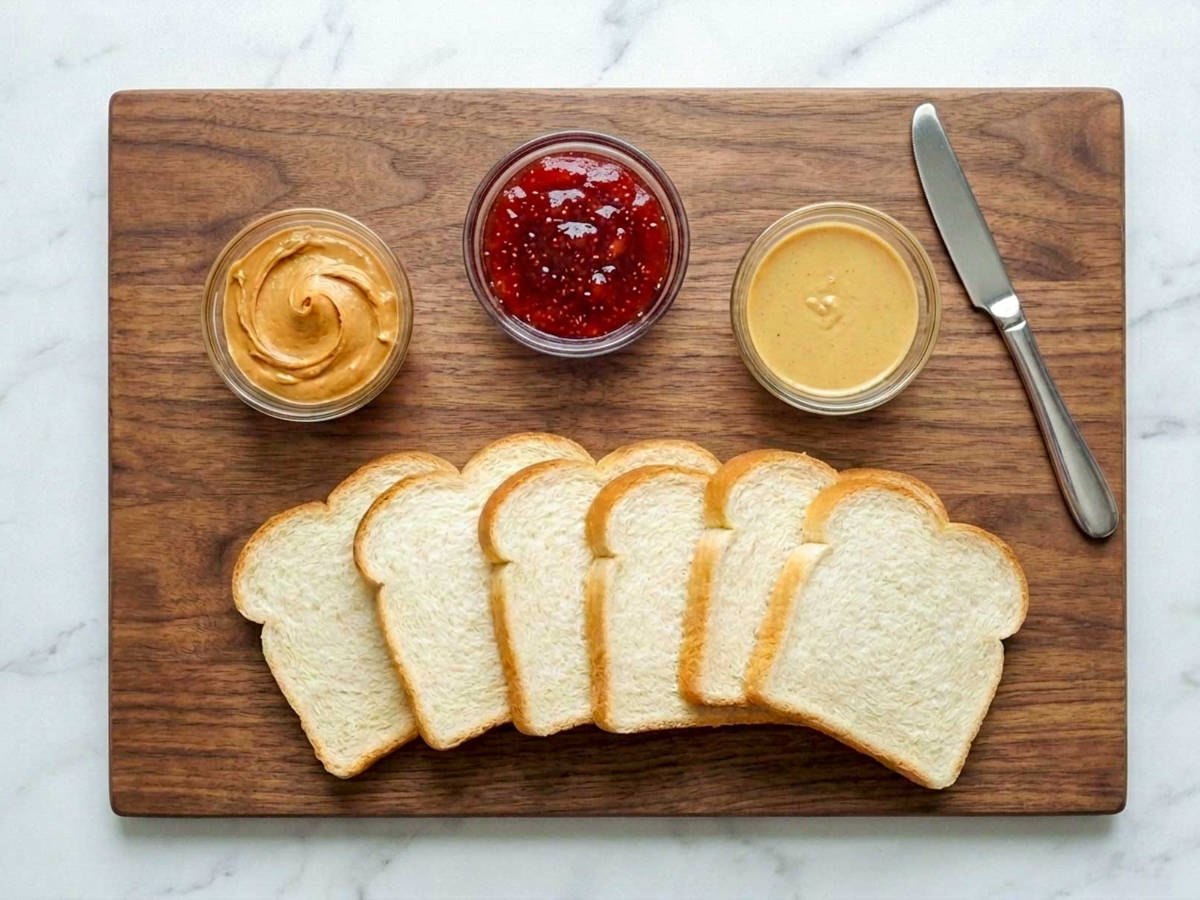
- Soft white sandwich bread. Standard supermarket sandwich bread is genuinely the right choice here, not a compromise. It has the pliability to compress and bond at the edge. Crusty artisan loaves and thick bakery slices tear instead of sealing. Slices that are a day old handle better than a loaf opened five minutes ago, because very fresh bread is wetter and more likely to shred under the glass.
- Creamy peanut butter. Creamy seals better than chunky, since nut pieces sitting near the border interrupt the bond.
- Jam or preserves. Jam consistency makes a noticeable difference. Thick jam or fruit spread is much easier to contain than a loose, runny jam.
- Sunflower seed butter, for nut-free schools. For the sunflower seed butter version, I use the same basic method as the peanut butter sandwich. Sunflower seed butter can be slightly looser or more oily, so I stir it thoroughly before spreading and use a thin, even layer. Its flavor is a little more pronounced than peanut butter, but it works well as a nut-free option.
The Best Bread For Homemade Uncrustables
You want soft, thin-sliced white or wheat sandwich bread. Look for a slice that gives when you press it and springs back rather than crumbling. Standard sandwich loaves are milled and conditioned to be soft and slightly stretchy, and that stretch is what lets the two slices fuse under fork pressure.
What does not work: sourdough with an open crumb, ciabatta, any crusty loaf, thick-cut Texas toast, and anything with large seeds or grains near the surface. Open crumb is the specific problem, because the holes give jam somewhere to travel.
If you bake your own, our sourdough sandwich bread has a tight enough crumb to work, as long as you slice it thin and let it sit a day. Gluten-free bread works, but it is more fragile. Let those slices come fully to room temperature first and press more gently.
How To Make Homemade Uncrustables
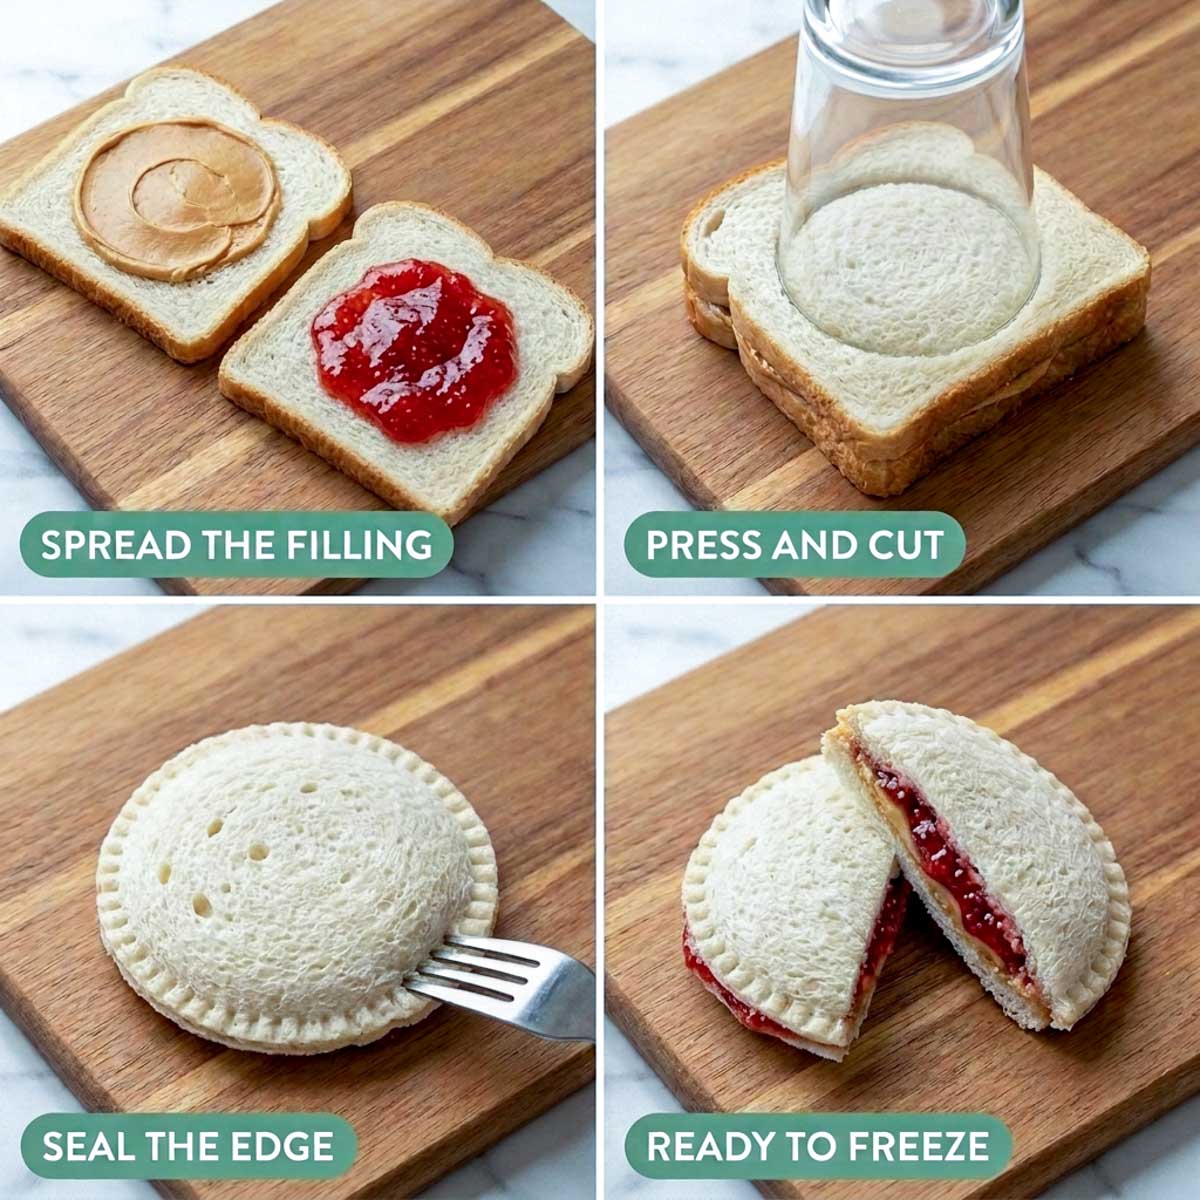
- Lay out the bread. Set out 16 slices in pairs. Working in pairs from the start keeps the count straight.
- Spread the filling, leaving a wide clean border. Spread about one tablespoon of peanut butter in a small circle in the center of one slice, and about one and a half teaspoons of jam in the center of the other. Keep both circles around two and a half inches across, well inside the edge of the bread, with a wide, completely clean border of plain bread all the way around. This border is the seal.
- Press the slices together. Line them up filling to filling and press gently across the whole surface with your palm.
- Cut the circle. For the no-sealer method, I use a wide drinking glass with an opening about 4 inches across. A glass with a relatively thin rim cuts through the soft bread more cleanly than one with a thick, rounded edge. I press straight down firmly, then twist to release the circle before lifting the glass away. Pull away the trimmed crusts.
- Crimp the edge. After cutting, I go around the sandwich with a fork to reinforce the seal. A properly crimped edge should look flat and compressed, with the two bread layers firmly joined all the way around. I check for raised sections, small gaps, or places where the bread begins to spring apart. Those are the areas most likely to open during freezing or thawing. I press firmly enough to seal the bread, but not so hard that the fork cuts completely through it.
- Freeze flat, then bag. Lay the sandwiches in a single layer on a parchment-lined sheet pan and freeze about an hour, until firm. Then move them into individual bags or a container.
Match the glass to your bread. Four inches suits a standard sandwich loaf. If your slices are smaller, or you are using a bakery loaf with a wider slice, size up or down so the cut still leaves a clean border of plain bread around the filling.
If you have a sandwich sealer press
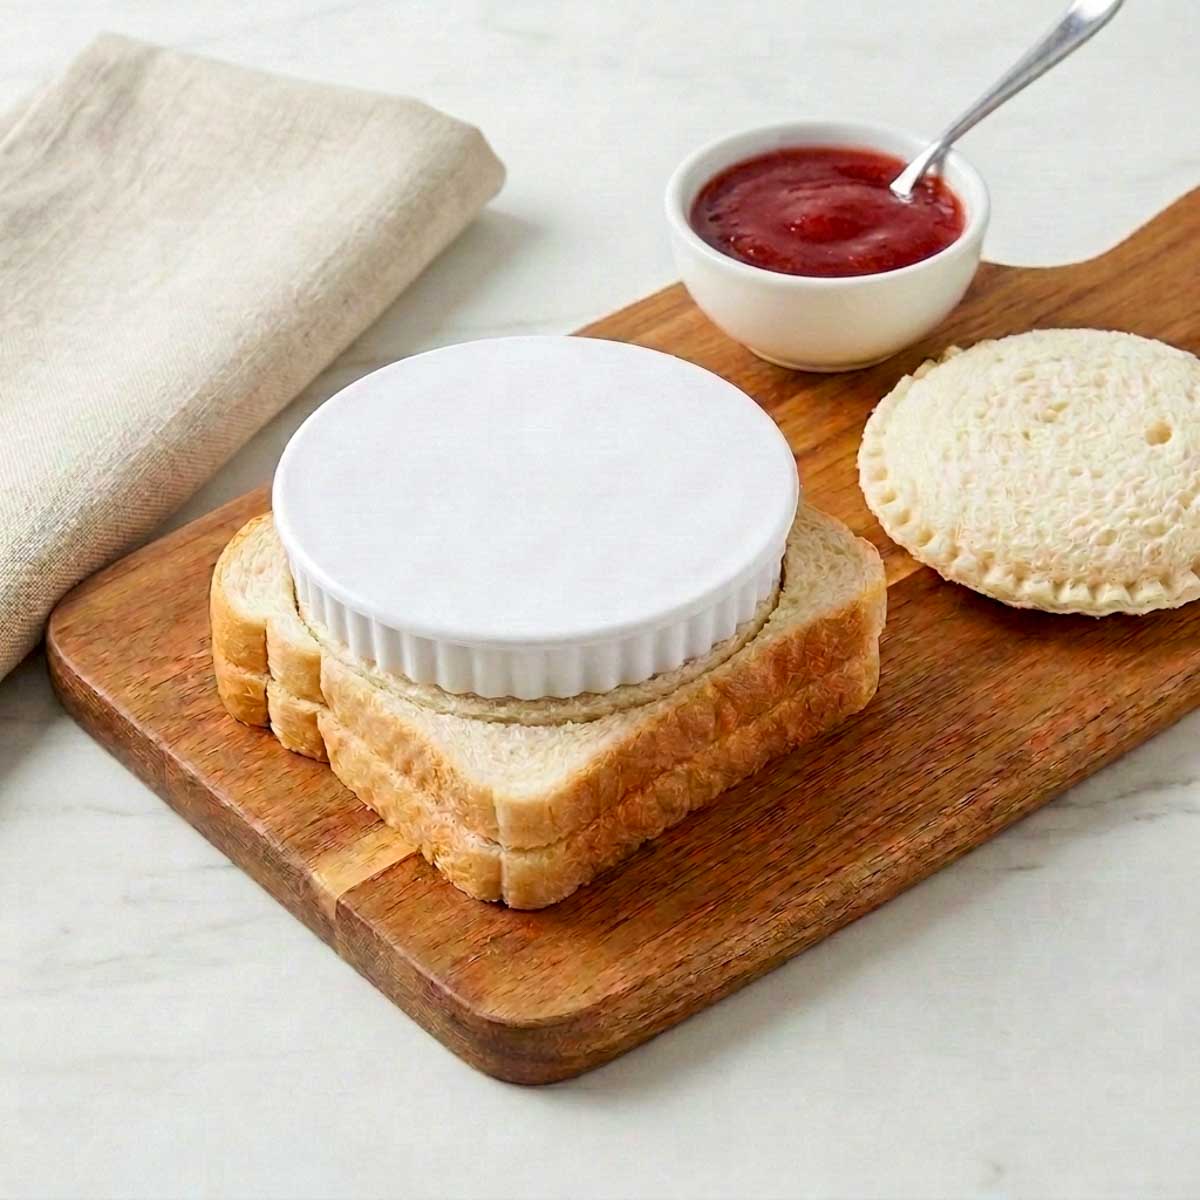
The press does steps 4 and 5 in one motion. Set it over the stacked slices, press straight down through both, then lift and remove the trimmed crusts. Check the same things you would check on a fork-crimped edge: flat, compressed, no raised sections or gaps.
Uncrustables filling ideas
The method does not care what is inside, as long as it is not watery and it stays inside the border.
Sweet
- Peanut butter and jam, the classic
- Sunflower seed butter and honey, for nut-free lunchboxes
- Cream cheese and strawberry jam
- Chocolate hazelnut spread
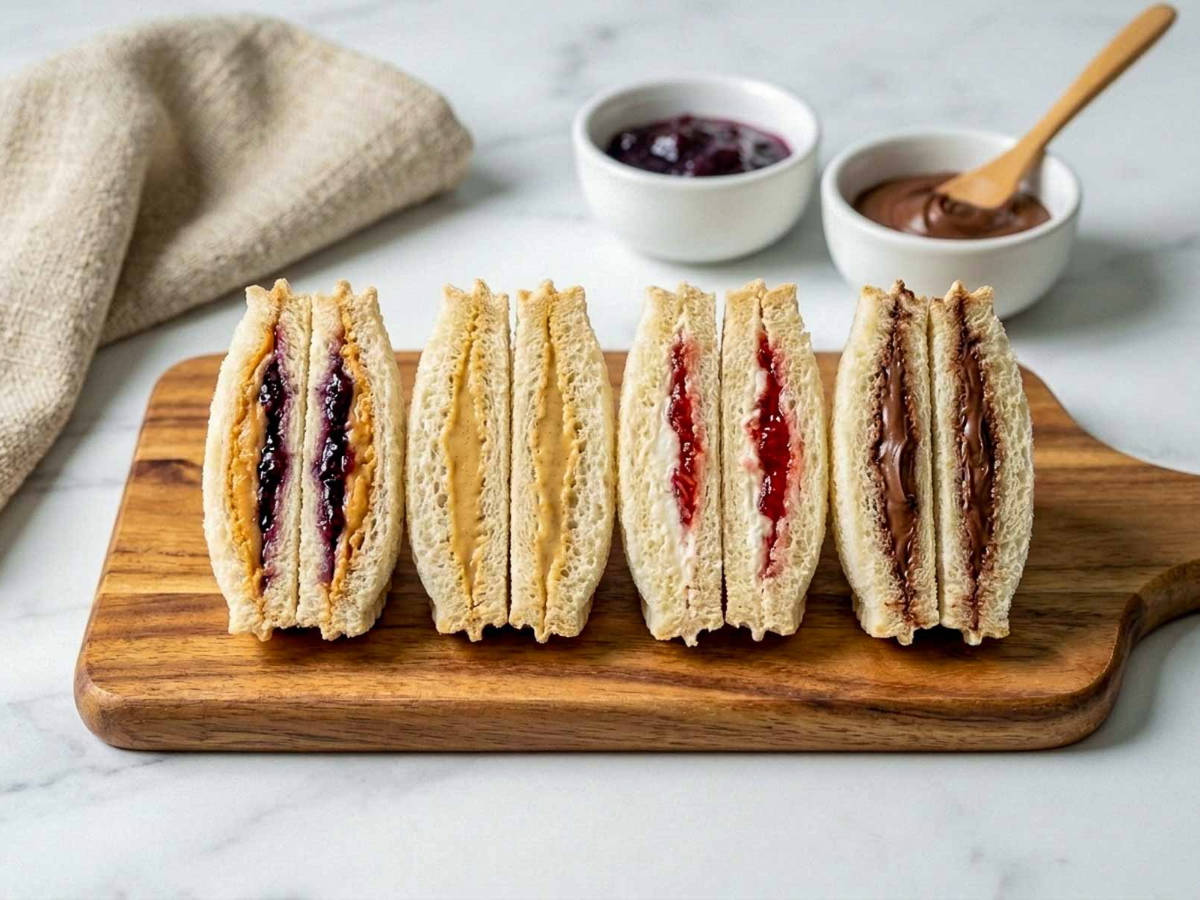
Savory
- Cheddar, which softens into a grilled-cheese texture if you toast it after thawing
- Pizza filling, with thick sauce and shredded mozzarella
- Egg salad, drained well
- Cream cheese and thin cucumber slices
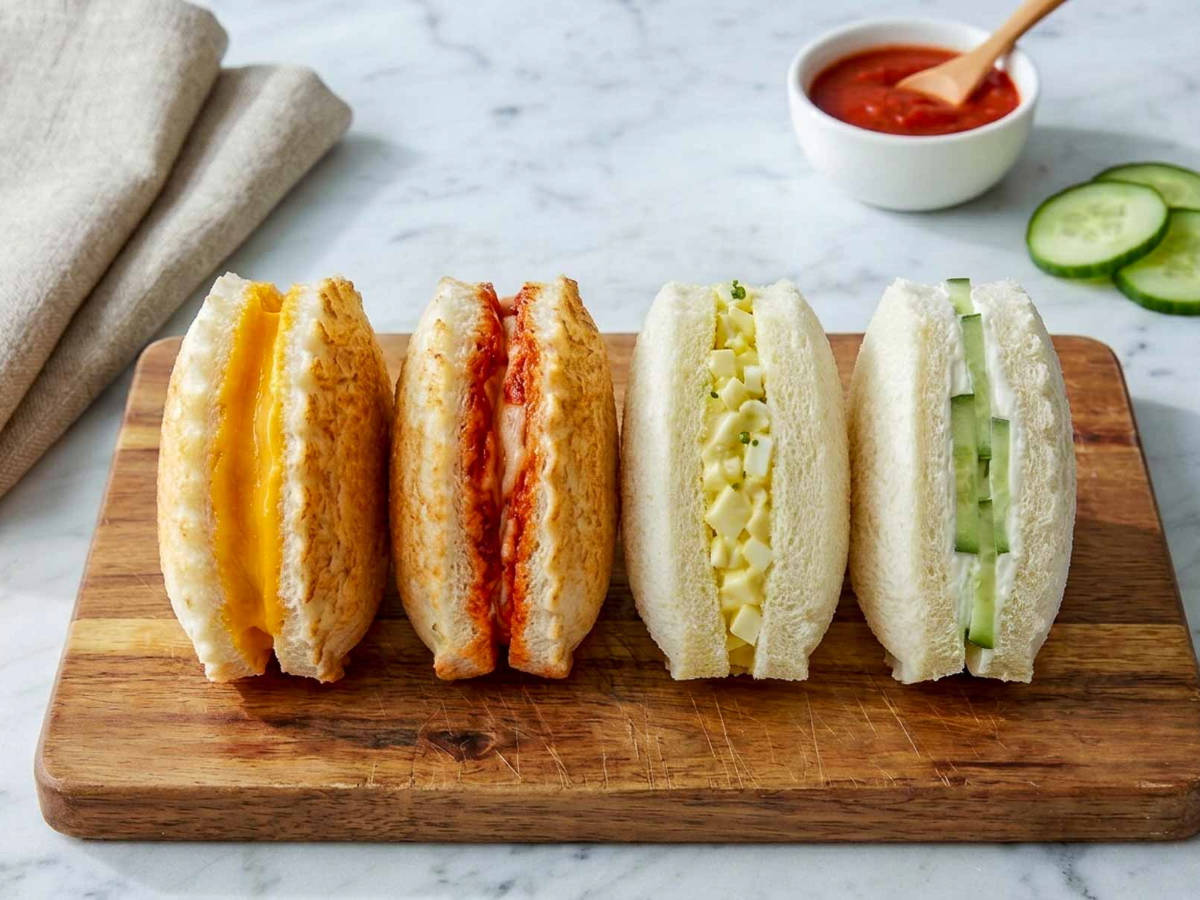
Two rules for homemade Uncrustables filling: keep it thick, and keep it off the border. Anything loose enough to run will eventually find the seam. For more lunchbox variety alongside these, our lunchbox snacks for picky eaters cover the rest of the box.
How To Store Homemade Uncrustables
I freeze the sandwiches in a single layer before transferring them to a reusable container. This is the step people skip, and skipping it is how you end up with a frozen block.
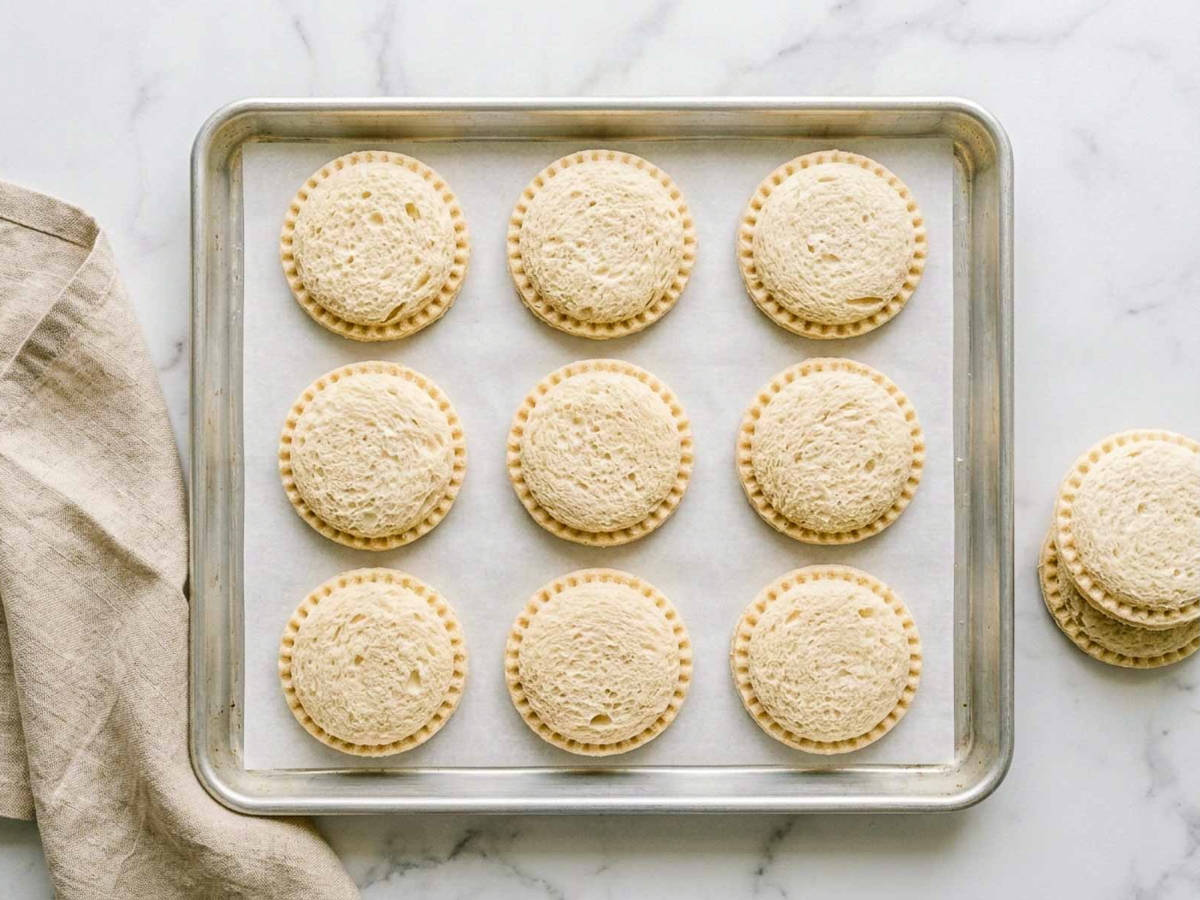
Once they are firm, move them into individual bags or stack them upright on their edges in a container. Upright rather than flat-stacked matters, because sandwiches lying face to face will bond as they sit.
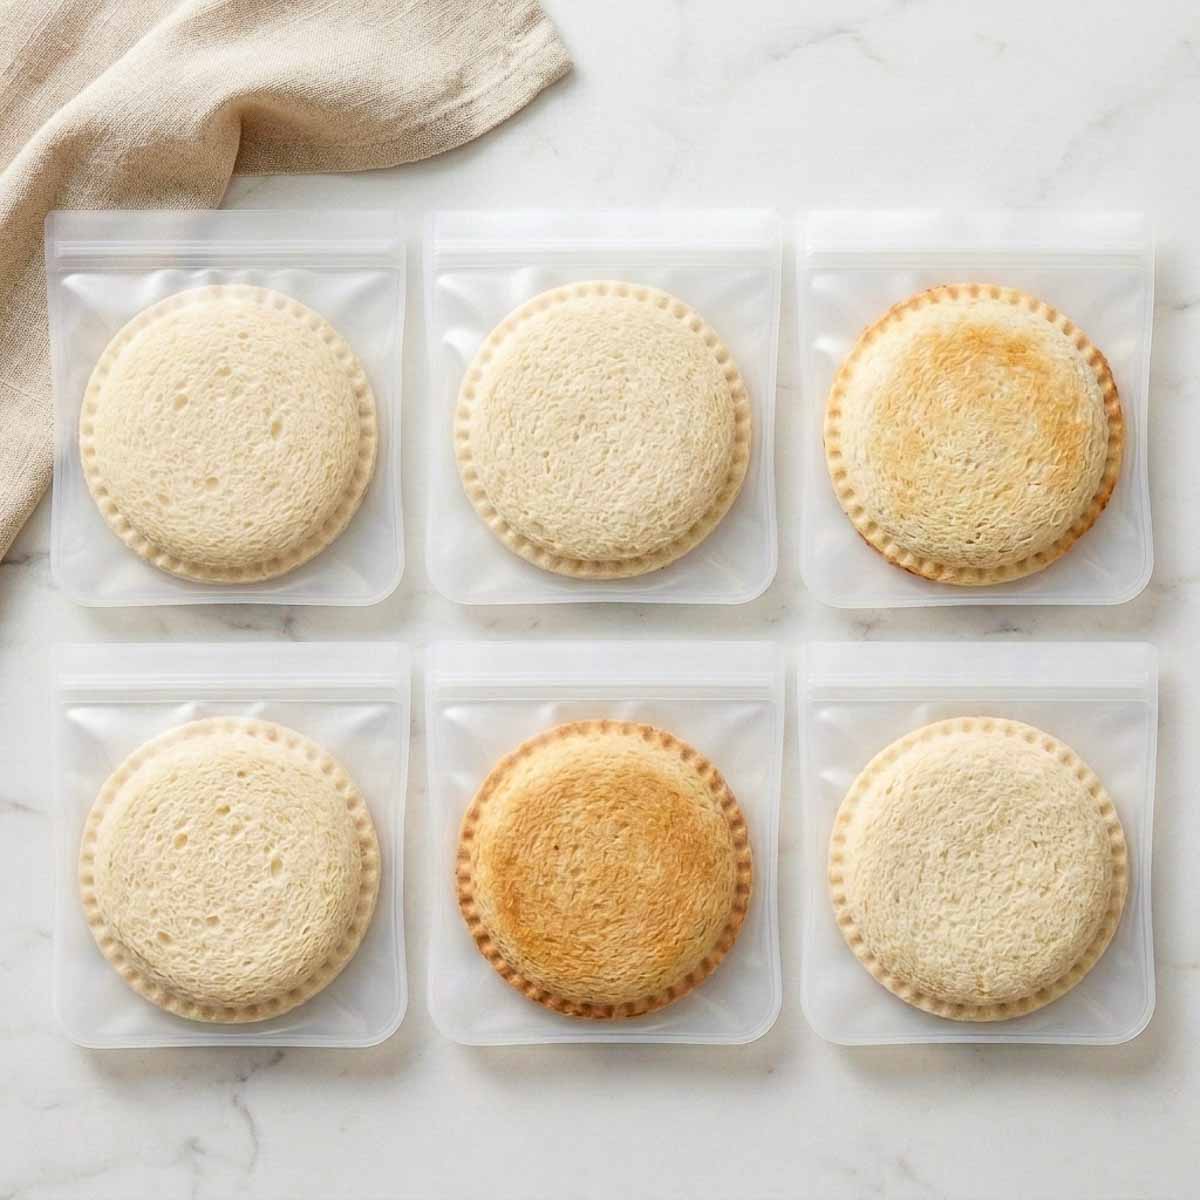
Label the container with the date. Homemade Uncrustables frozen this way hold their texture for about a month. They stay safe well beyond that, but the bread starts to dry, and the seal gets brittle. When I pack one frozen in a lunchbox in the morning, it gradually thaws and is usually soft enough to eat by lunchtime.
Is It Cheaper To Make Your Own Uncrustables?
Generally yes, and the reason is simple: you are buying bread and a jar of spread rather than buying bread, spread, packaging, and freezing.
The bigger practical gain is control. You choose the bread, the spread, and how much jam goes in, and you can make a nut-free version without hunting for a specialty product.
One cost people forget: the trimmed crusts. You are paying for bread you cut off. Save them in a bag in the freezer and blitz them into breadcrumbs once you have enough, which means nothing is wasted.
What To Pack Alongside
A sandwich alone is not a lunch, and the round shape leaves space in a divided box for exactly three small things.
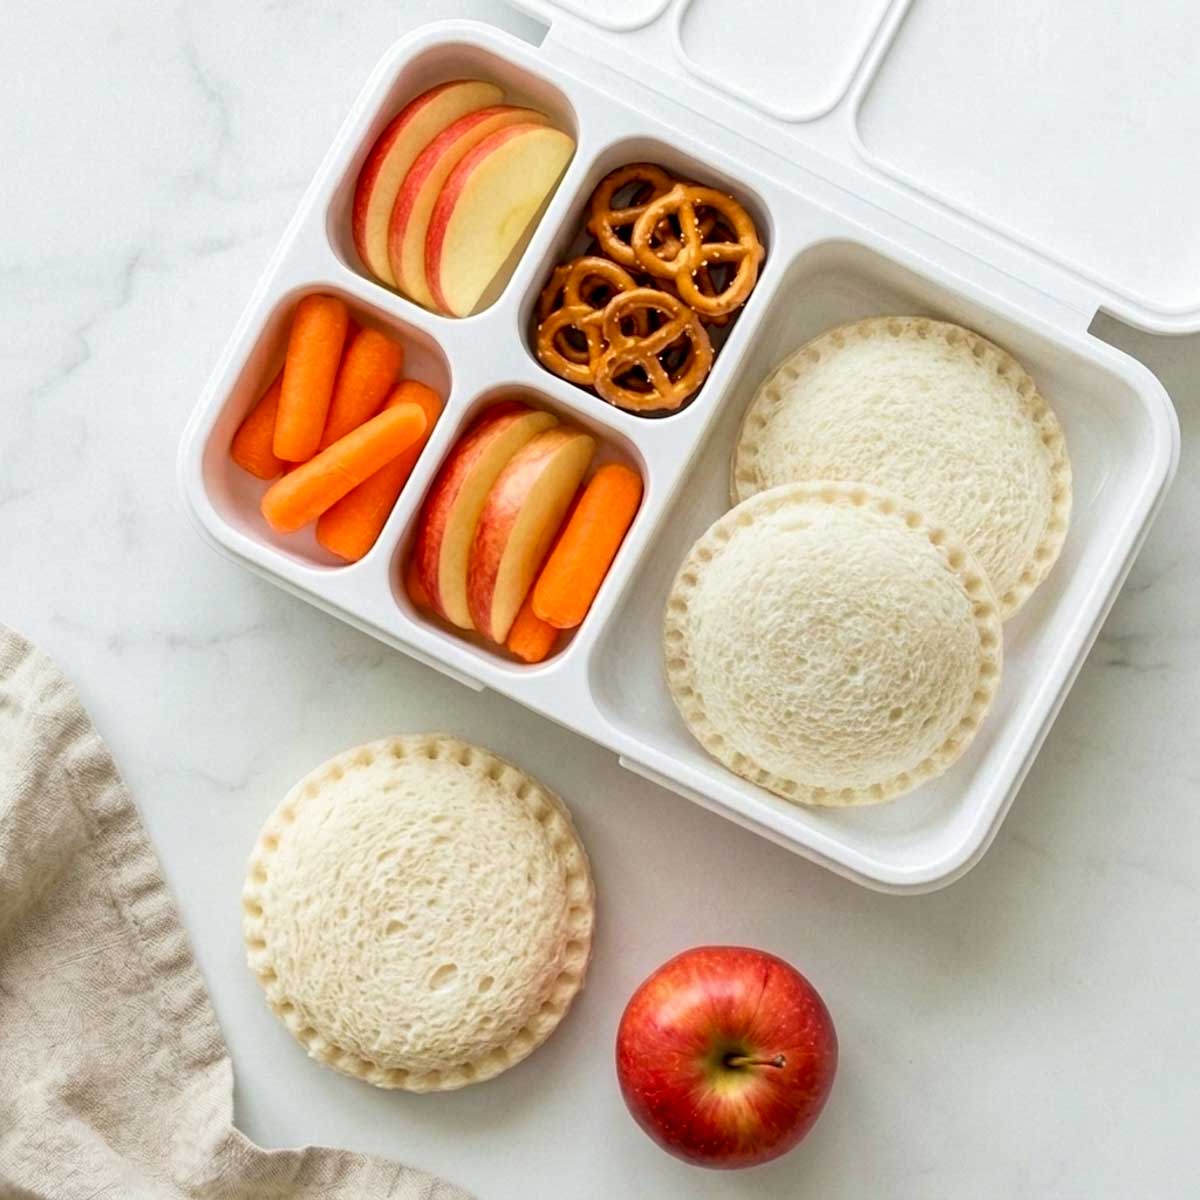
Apple slices, baby carrots, and a small handful of pretzels fill it out without adding morning work. For more ideas on building how to make homemade Uncrustables lunch box routines that survive a full week, our 50 school lunch ideas for kids work through the whole rotation, and 20 cold lunch ideas for high schoolers cover older kids with no access to a microwave.
Homemade Uncrustables FAQs
A wide drinking glass and a fork. Press the glass rim straight down through both slices to cut the circle, then crimp the cut edge with fork tines all the way around. A glass with a relatively thin rim cuts through the soft bread more cleanly than one with a thick, rounded edge.
The biggest issue with homemade Uncrustables is using too much filling. When the peanut butter or jam reaches the outer edge, the bread cannot seal properly, and the sandwich is more likely to split. Keep the filling in a small circle in the center and leave a wide, completely clean border around it. Another common cause is jam that is too thin, which spreads outward while the sandwich sits. Use a thick jam or fruit spread, and the seal holds.
The exact timing depends on the lunchbox and whether it is packed beside an ice pack, but allowing around three to four hours works well for a typical school morning. On the counter at home, give it about the same, or 30 seconds in the microwave if you are in a hurry.
Yes, and it is the best thing to do with a savory one. From frozen, 350°F for four to five minutes gives you a crisp outside and a melted center. Let it sit a minute before handing it to a child, because the filling holds heat.
Yes. Use a soft gluten-free sandwich loaf, bring the slices fully to room temperature so they are pliable, and press more gently when you crimp. Expect a slightly less defined crimp. It still seals.
Pin It For Later
Made these? Leave a comment below and let me know which filling was a hit, or tag @wholesomefamilymeals so I can see how your batch turned out. If you want more freezer-friendly lunchbox ideas, sign up for my newsletter, and I'll send them straight to your inbox.
Equipment
- A wide drinking glass or sandwich sealer press
- Parchment paper
- Reusable silicone storage bags
- Knife
- Chopping board
Ingredients
- 16 slices soft white sandwich bread
- ½ cup creamy peanut butter or sunflower seed butter for nut-free
- ¼ cup thick jam or preserves
Instructions
- Lay out 16 slices of bread in pairs.
- Spread about 1 tablespoon peanut butter in a 2½-inch circle in the center of one slice of each pair. Spread about 1½ teaspoons jam in the center of the other. Leave a wide, completely clean border of plain bread all the way around both.
- Press each pair together, filling to filling, pressing gently across the whole surface.
- Set the rim of a wide drinking glass about 4 inches across in the center and press straight down firmly through both slices, then twist to release. Lift away the trimmed crusts.
- Press fork tines into the cut edge all the way around, overlapping each press, until the edge looks flat and compressed with no raised sections or gaps.
- Arrange in a single layer on a parchment-lined sheet pan and freeze for about 1 hour, until firm. Transfer to individual bags or stack upright in a container. Freeze up to 1 month.
Notes
- The clean border around the filling is what makes the seal hold. Filling that reaches the edge is the reason homemade versions split.
- Press straight down firmly, then twist to release the circle.
- A glass with a thin rim cuts more cleanly than one with a thick, rounded edge.
- Match the glass to your bread. Four inches suits a standard sandwich loaf, so size up or down for wider or smaller slices.
- Press the fork firmly enough to seal, but not so hard that it cuts through.
- Thick jam holds. Thin jam travels and finds the seam.
- Day-old bread seals better than a freshly opened loaf.
- Pack frozen. Allow around 3 to 4 hours to thaw for a typical school morning.
- Freeze flat in a single layer before bagging, or they fuse together.
- Save the trimmed crusts in the freezer and blitz them into breadcrumbs.
- Air fryer from frozen: 350°F for 4 to 5 minutes.